Not everyone likes to admit this, but protective hairstyles are like a blessing from above for black women. Beyond being absolutely stunning, they empower us to express our unique style, all while significantly reducing styling and maintenance time.
The style choices are endless. There’s the classic box braids, knotless braids, passion twists, mini-twists, mini-braids, bantu knots, cornrows, wigs and sooo many more. The beauty of black hair lies in the myriad styles we can embrace, each reflecting our unique personalities and preferences.


Now, here’s the gist: a not-so-scientific, but legit-ish study (read: my life observations and a dash of humour) suggests that a whopping 99.9999% of black women have ventured into the world of protective styles at least once in their life. However, what not everyone in this 99.9999% might realise is that there’s a right and wrong way to embrace these styles. Done incorrectly, they could turn into a hair nightmare – think receding hairlines, excess hair fall, breakage, and split ends.
Scary stuff, right?
Fear not, my friend! This blog post is your comprehensive guide on turning protective styles into your hair’s best ally. We’re talking growth, length retention, moisture retention, etc—so keep on reading for all the deets!
Pre-installation care for your protective hairstyles
A successful protective style begins with what you do before you install your style.
Wash-day
The foundation of a successful protective style begins with your wash day (as does anything else natural hair related), and two indispensable products are at the forefront: clarifying shampoo and deep conditioner.
If you didn’t already know, clarifying shampoos are the heavyweights in hair cleansing. With potent surfactants, they obliterate build-up and impurities, leaving your hair stripped (in a good way) and refreshed.
Deep conditioners, like regular ones, hydrate and condition hair. However, they go the extra mile with low-molecular-weight ingredients, penetrating deeper into the hair shaft. This helps fill cuticle gaps, ensuring prolonged water retention in your hair. This is also good to give your hair added strength before a blow dry should you decide to do so.
(P.S, for more guidance on the role of hair products in your hair products in your routine check out our older blog post by clicking here).
Opting for a clarifying shampoo over a moisturising shampoo ensures you start your protective styles with a super clean scalp and hair.
Pro shampoo tip: Gently scrub your scalp using your fingertips and not your fingernails. Also smooth the shampoo into your hair strands using the praying hands method and gently raking. Video demonstrations shown below!!
After shampoo, head straight into your deep conditioner. Detangle your hair to evenly distribute product (and obviously to detangle your hair). Leave the conditioner in for 5-30 minutes, and apply heat for deeper product penetration should you wish to.
This sets your hair for deep hydration.
For moisture retention, use leave-in products containing film-forming humectants so your hair can draw moisture from the environment when necessary (again click here for more info on what film-forming humectants are).
Blow-drying
This part is simple. Use heat protectant, don’t be rough when combing through your hair, and use smaller sections if you are struggling.
Period.
What to do if you have a sensitive scalp pre protective hairstyle installation when using synthetic hair?
For a smooth sailing protective style you can also prep the braiding hair and/or extensions instead of just your natural hair.
We are all too familiar with that scathing, incessant and invincible itch we get on our scalp on the early days of our new protective styles with added synthetic hair. Mh hmm I’m talking about that itch where no amount of water, oil and leave-in helps to stop it since you believed it was due to dryness.
But now you know better, and know that it’s a reaction to the chemicals applied to synthetic hair. For example, these chemicals help protect the synthetic hair from heating effects.
To combat this you could buy anti-allergenic hair, orrr if you like to do things the long way here’s how:
1. Choose Your Weapon: Apple Cider Vinegar or Shampoo
To bid farewell to the notorious braid itch, start by giving your braiding hair a thorough wash. You have two powerful options at your disposal: apple cider vinegar or a clarifying shampoo. Both work wonders in eliminating any lingering residues or irritants, providing a clean slate for your protective style.
2. The ACV Elixir
- Mix equal parts of apple cider vinegar and water in a bowl.
- Gently soak the braiding hair in this solution for 15-20 minutes.
- Rinse thoroughly to ensure all traces of the mixture are gone.
3. The Shampoo Showdown
- Opt for a clarifying shampoo known for its deep-cleaning prowess.
- Lather the braiding hair, ensuring you reach every nook and cranny.
- Rinse thoroughly to leave the hair refreshed and ready for styling.
When installing protective hairstyles
How to stop bald spots and receding hairlines
Braiding the roots super tightly is a good way to cause bald spots and mess up your hairline. If that’s what you want, then sure, continue. The real risk is when this is done continuously, protective style after protective style after protective style, year after year.
If a seamless and comfortable braiding experience is your goal, communicate your preferences to your braider or yourself. Ensure there’s some flexibility in the braiding pattern, making it clear that not every thought needs to be braided. Additionally, prioritise the health of your edges by requesting that they are left out to breathe. This thoughtful approach ensures not only a stylish outcome but also the well-being of your hair.
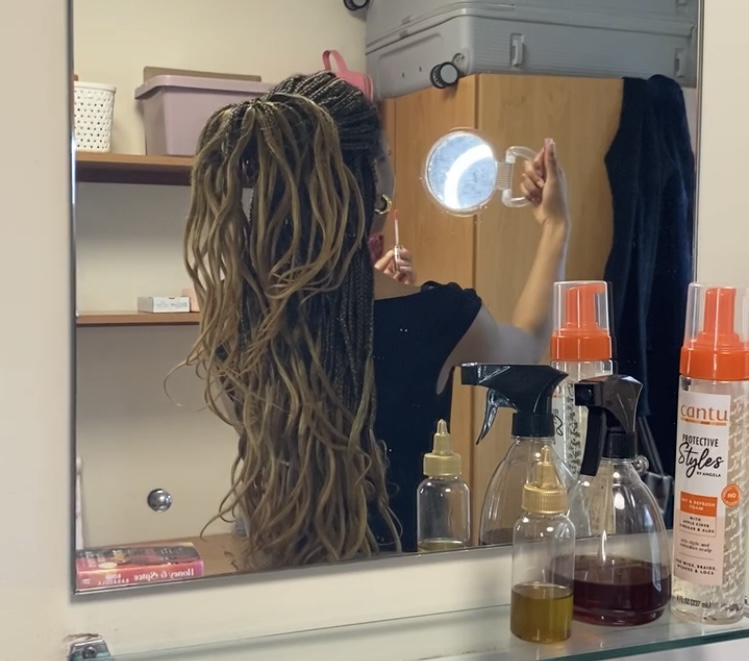
On using gels and waxes on the scalp for protective hairstyles
A new trend in the styling world is the use of gels, waxes and gummy jams at the root for a neater look. This is great and all but it is important to note that these products are meant for your hair and not your scalp. This is especially true if you’re not planning on washing your hair for a long time. Application on the scalp can lead to unwelcome consequences, including excess product build-up, flakes, and irritation. Whether communicating with your hairstylist or practising your own hairstyling skills (major kudos if you do!), a gentle reminder to focus these products on your hair, not your scalp, ensures a stylish outcome without compromising scalp health.
Protecting the ends
One of the main reasons to do a protective hairstyle is to protect the ends of your hair.
If you don’t already know, the ends of your hair are the weakest and most fragile. These fragile tips are prone to breakage and split ends, affecting the overall length retention of your hair… Something which I’m guessing you don’t want. Protective styles play a pivotal role in shielding these vulnerable ends, thereby limiting breakage and promoting healthy hair growth.
When you’re styling with synthetic styles like braids or twists, don’t forget this golden rule: keep your natural hair tucked in. Exposed ends? They’re like magnets for breakage, especially if your hair underneath isn’t getting the TLC it deserves.
So, whether it’s your go-to stylist or your own hands working that magic, make a note to keep those ends hidden away and cared for.
Nurturing your kinks and coils during your protective hairstyles: some dos and don’ts
In the realm of hair care, it’s easy to get caught up in the excitement of styling and maintenance. However, when it comes to leave-in, mousses, oils, butters, and style duration, a little strategy can go a long way.
1. Less is more with hair products and oils:
- Don’t Overdo the Oil: For a lot of us naturals, wearing protective hairstyles is when we get serious with hair growth and with this often comes the application of hair growth oils or regular shmegular oils. While oils can be a hair saviour, resist the temptation to oil up every single day. Overuse can lead to a less-than-glamorous outcome – attracting dirt, encouraging flaking, and, worst of all, creating a lint ball party at the knots of your hair.
- Leave the Scalp Alone: A healthy and clean scalp is the foundation for healthy hair growth, and bombarding it with products daily can throw it off balance. The ‘leave-in conditioner, hair mousse, cream, oils etc every day’ routine might sound like a treat, but here’s the inside scoop – your scalp needs a breather. Frequent application can lead to build-up, potential irritation, and disrupt your scalp’s natural equilibrium. Again, also limit this to once a week.
It’s crucial to recognize that many leave-ins and creams aren’t formulated for direct scalp application. If you’re aiming to moisturise both your hair and scalp simultaneously, opt for a hair mousse. These lightweight wonders are often enriched with moisturising and nourishing ingredients, ensuring your scalp stays unclogged and your hair avoids the burden of heavy build-up.
2. Timing Is Everything with Styles:
- Set a 2-Month Limit: Protective styles are undeniably fabulous, but remember, all good things come with an expiration date. Aim to keep your styles fresh for a maximum of 8 weeks. Anything longer risks not just a style slump but also the accumulation of shed hair trapped within and of course, its time for a deep wash and some real moisture.
3. Wash Away the Dirt:
- Don’t Forget to Wash: If possible, give your hair the cleansing it craves. Washing might seem like a hassle, but it’s a game-changer for maintaining a healthy scalp and vibrant hair. Plus, it’s your ticket to breaking free from the shed hair entrapment that prolonged styles can bring.
Final words
In essence, a little mindfulness in your hair care routine can keep your natural hair flourishing and your protective hairstyles on point.
Stay tuned for future posts on post-protective style maintenance routine 🙂
<3 <3 <3